Its possible to install content onto your Oculus Quest or Quest 2 that’s not yet available on the official Oculus store. The reason its not yet on the store is that it isn’t approved by Facebook. Does that make it unsafe? No. Does that make it illegal? No. Actually, they don’t mind. It allows publishers to test their apps by allowing users to try them out. Very often apps will be released officially after all the bugs have been sorted.
The first Oculus Quest launched in May 2019 and its successor, the Quest 2 followed in October 2020. Both of these headsets are standalone systems, meaning we don’t need to be tethered to a console or PC. We can however, use SideQuest to load content onto our Quest or Quest 2 device with our PC, opening up an even bigger library of apps for us to enjoy.
Before apps can be released, Facebook decided that they would implement a curation policy for content that would appear on the Quest through its official Oculus Store. This policy will operate in a similar manner to policies on traditional consoles like the Xbox or PlayStation. This allows them to better regulate any app that is listed. Developers were initially sceptical of the impact a stringent process could have on the production of their apps, especially on what is a relatively new market, but many have actually seen some strong results.
With the curation policy in place, users were wondering if they could still run other content on their Quest device that’s not curated by Facebook for the Oculus store. Thanks to sideloading, we can.
When sideloading, although legal and usually safe, always bear in mind that you are putting content onto your device that has not been approved by Facebook and could potentially damage your device, even if it doesn’t appear so at first, the content could contain malicious code. Always use a reliable source for your sideloaded content.
What is sideloading?
‘Sideloading’ is the term applied when we load content such as apps or games from a source which is not an ‘official’ store; such as the Oculus store, Google play store or Apple store, for example. Rather than downloading the content to our PC, Sideloading avoids this method by placing the content directly onto your device. With the Quest, we use a USB cable to transfer the content.
It might sound like a daunting task, but it is actually very simple to do. You should always take care when sideloading. Make sure you still get the content from a reputable source, or you could risk damaging your device with malicious software.
Sideloading isn’t new, or exclusive to VR or the Quest. Sideloading has actually been around since the late 1990s with i-drive. The term also applies to everyday computing, where users install software they’ve downloaded online. You’ve probably done it many times before and not even realised. If you’ve ever downloaded an unverified piece of software from a website on the Internet and installed it on Windows, that is technically sideloading.
When we speak of sideloading on the Quest, we simply mean the process of loading content onto our devices that Oculus have not approved or verified officially, and so does not appear listed on the Oculus Store. Anything you install on your Quest outside of the official store, is sideloaded.
Why sideload?
If you’re wondering why you would sideload instead of just using the official store then you are missing out on some great content. Sideloading unlocks so much more content than what we can find in the Oculus store – for free!. VR is still relatively new for a lot of games developers, so releasing content for us to sideload is helpful for everyone.
Most content we sideload will be builds still in a beta mode, released by the developer before the game is actually finished. This allows the developer to fix any bugs, or make changes through user feedback – and we get some free gaming.
One of the reasons a lot of people sideload to the Quest, is to load custom content. Certain games, such as Beat Saber allow us to install custom content, such as new songs. Find out how to do that here.
We can also install apps that are not yet available on the Oculus Store or via App Lab.
SideQuest vs App Lab
Until the launch of App Lab back in February, the only way we could install content not listed on the official store, was through sideloading. App Lab is actually an official release by Oculus themselves.
App Lab is Oculus’ official way of installing content onto your Quest that’s not yet in the store. It has made it far easier to get the content onto our device than using SideQuest to sideload it.
However, not all content available to sideload is available on App Lab. Game developers would still need to get approval to be listed on App Labs platform. The curation is nowhere near as strict as it is for the Oculus store though, so many apps find themselves listed here before being released onto the store later.
While this is the case, sideloading non-Store content onto your Quest, with SideQuest, remains a requirement to access certain content that is not available from App Lab.
You can learn more about App Lab, and how to find apps to install here.
If the content you want to install on your Quest is available as an App Lab app, you should do so there. If not, then continue to read more about how to get it from sideloading with SideQuest.
Download & Setup SideQuest
Firstly you’ll need to download SideQuest here: https://sidequestvr.com/setup-howto
SideQuest is a third-party PC, Mac and Linux application that makes sideloading content onto your Quest easy. It has a store page that lists popular apps that are available for sideloading. Once you complete the initial set up of SideQuest, the whole process becomes much simpler to do subsequent times, often done with just a few clicks.
Initial Setup
In order to use SideQuest, you’ll need to make some changes to your Quest device and Oculus account. You only need to do this once, not every time you want to sideload something.
Use a USB cord to connect your Quest to your computer
You can use the charging cable that came with your Quest for this, or you can use the Link cable if you have one. Your computer will need to have a USB-C port, otherwise you will need to purchase a USB-C to USB-A adaptor. A third party cable will also work provided it has a USB-C port to connect to the headset and the other into the port on your PC.
Register as a developer on the Oculus account associated with your Quest
To use sideloading on your Quest device you must access the Developer Mode. To do this, you will need to register as a developer organisation first.
Do that here: https://developer.oculus.com/manage/organizations/create/
Make sure you log in with the same Oculus account that you registered your Quest with. Simply enter a new organisation name and tick the box to continue. Don’t worry – you don’t actually need to have a real organisation to do this.
Enable the Developer Mode on your Quest
Once you register as a developer you will be able to enable the Developer Mode on your Quest device. You can do this through the Oculus app (with the same phone that is linked to your Oculus account/your Oculus Quest).
Open the Oculus app on your phone and your turn your Quest headset on so it connects to the app.
1. Tap ‘Settings‘ in the bottom right.
2. Locate your Oculus Quest in the Settings tab, and make sure it reads “Connected“. If the app can’t connect to your Quest, you may need to go into the settings on the Quest itself and try to manually connect to the app. (Your Quest should be turned on, and your phone should have its Bluetooth and WiFi turned on as well).
3. Tap on the arrow button next to your device.
4. Tap the ‘More Settings‘ button.
5. Tap on ‘Developer Mode‘.
6. Toggle the switch to ‘On‘ instead of ‘Off’.
7. Reboot your Quest. You can do this by holding down the power button and select ‘Power Off’ or ‘Restart’. Your Quest should now reboot and start in Developer Mode.
USB debugging between PC and Quest
This is also a one-time step.
1. Open the SideQuest application installed on your computer.
2. Turn on your Quest and set up the guardian.
3. Plug your Quest into your computer via the USB cable.
4. Put your Quest headset on (this is not on your computer) and you should see a request pop up asking you to “Allow USB debugging”.
5. To remove the need to keep pressing ‘OK’ on this screen every time you plug your Quest into your computer, make sure the ‘Always allow from this computer’ box is ticked.
6. Press OK.
Your Quest and PC should now be set up to allow you sideload apps via SideQuest.
Note: while this is a one time process, if you connect to a different PC you will need to install SideQuest and allow the USB debugging again on the new PC. If a firmware update disables Developer Mode on your Quest, go back to the Oculus app on your phone and switch Developer Mode back on. You will also need to restart your Quest headset.
How to sideload apps and games
Once you have followed the initial set up above, the actual process of sideloading apps and games is very easy to do.
Most apps and games will be available directly through SideQuest itself, which makes the installation process even easier. Some others may only be available to download externally however. If you do download an app externally, you can still install it with SideQuest.
Begin by connecting your Quest into your computer and open SideQuest. Check that SideQuest is still able to connect to your Quest. The top left side of SideQuest should show a green dot and to signify this. It is shown next to the numbered version of the SideQuest software.
If SideQuest has a red dot instead or says “disconnected”/ “unauthorized”, check that your Quest headset is turned on, connected properly and that you have completed all of the setup steps properly, including permissions.
SideQuest for Android
As of April 2021, SideQuest launched a new Android app which will allow you to sideload apps using just your Android smartphone. This option is only for Android at this time, so there’s no iOS app or support. iPhone users will have to stick to sideloading via the PC method above.
Installation
The SideQuest app is available to download on the Google Play Store. Begin by installing the app on your Android smartphone device.
Important: you must allow USB debugging between your computer and your phone
This should only need to be setup one-time:
1. Turn on your Quest and set up a guardian.
2. Unlock your smartphone and plug your Quest into your phone using a USB type cable.
3. Your phone will ask if you want the SideQuest installer to handle Quest/Quest 2. Press ‘yes’ and tick the ‘always’ checkbox. This will mean you wont have to see this prompt every time you connect your Quest to your smartphone.
4. Inside your Quest, on screen, you should see a request to “Allow USB debugging”. Click ‘OK’. Again, if you don’t want to have to confirm this screen every time you plug your Quest into your phone, make sure the ‘Always allow from this computer’ box is ticked.
7. If you see another prompt in your Quest asking if you want to allow your phone to access the Quest’s data. Click ‘yes’.
Your Quest and smartphone should now be set up to sideload apps via SideQuest.
Sideloading apps and games (Android)
Once everything is set up following the instructions above, sideloading apps and games is very easy to do.
Simply plug your Quest into your phone and open SideQuest. Double check that SideQuest is able to connect to your Quest by checking that there is a green dot on the SideQuest logo in the middle of the bottom toolbar of the SideQuest app. If it’s red or blue, see our steps above.

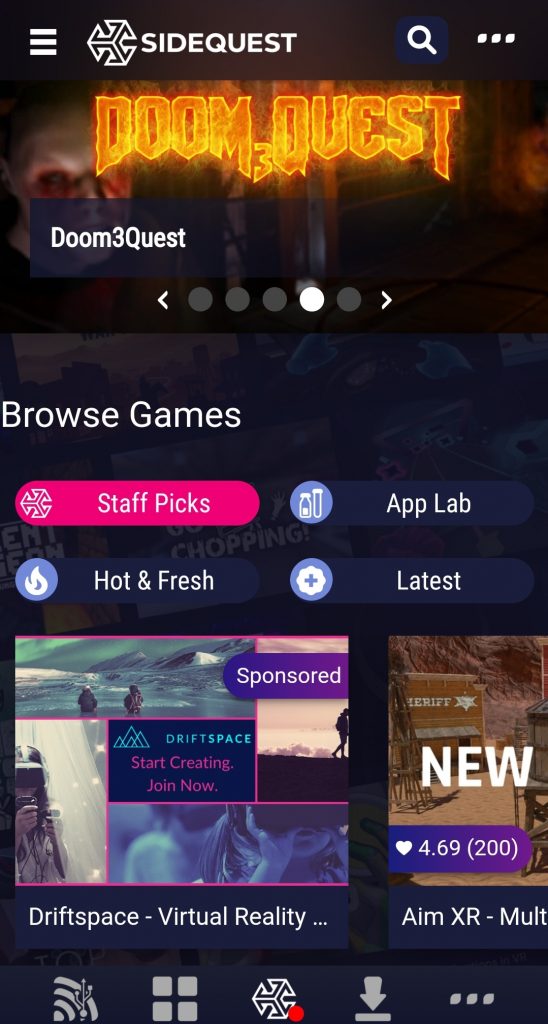
After you open the SideQuest app, you will able to browse and search all of the available content direct from the app’s homepage. Browse through the SideQuest app to find the content you want to install. You can search for apps or games by category if there is a particular type you want.
Once you’ve found something you want to install, open up that app’s listing page.
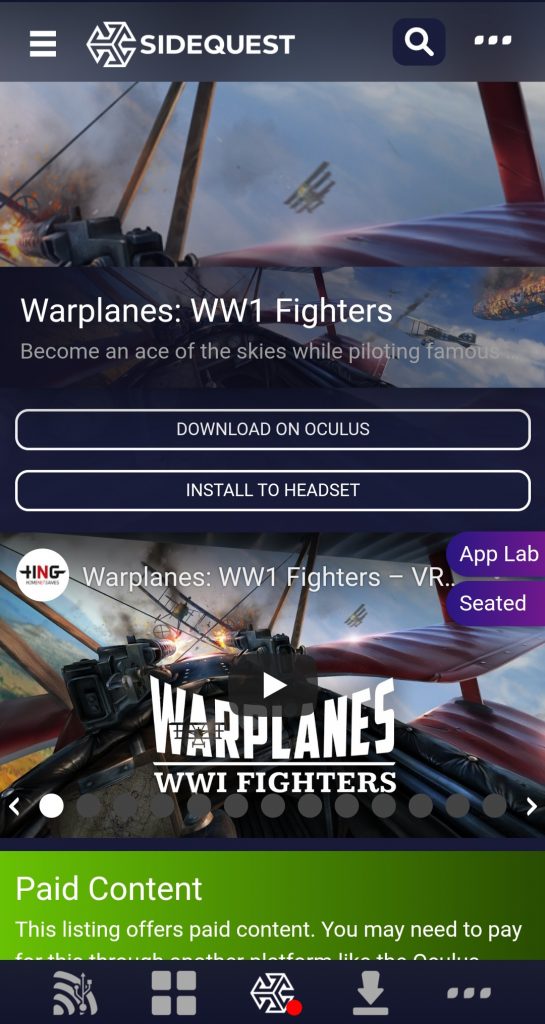
To install the app from here, click the “Install to Headset” button.
The app will begin downloading and then installing. You can check the progress in the downloads tab on the app’s toolbar.
Once the install is finished, the progress bar will change to read ‘Success’.
Sideloading apps and games wirelessly (Android)
It’s now possible to set up wireless sideloading functionality using and Android app by enabling wireless ADB (short for Android Debug Bridge). Most models of smartphone can use the SideQuest app to enable wireless. Some may be unable to, so wireless Sideloading wont work for you. If this is the case, you can still Sideload, but only through the PC SideQuest app, or a wired connection.
To enable wireless ADB through the SideQuest mobile app, just connect your Quest to your phone via a USB cable and open SideQuest. Click on the wireless toolbar button on the far left, from here, you can press ‘Enable Wireless’.
After you have done this, you can disconnect your Quest from your smartphone and press the ‘Connect’ button. This is next to the IP address at the bottom of the wireless menu within the SideQuest app. This will connect your Quest headset to the SideQuest app wirelessly. Ensure both devices are connected on the same wireless network to be able to sideload apps without a USB connection.
After enabling wireless capabilities, you shouldn’t need to connect your Quest via USB cable again (unless there is an update which may cause them to disconnect). SideQuest will remember your Quest’s local IP address, which allows you to just press the connect button every time you need to Sideload. If SideQuest does forget your Quest’s local IP address, you can find this easily. Locate the Wi-Fi settings of your Quest by long-pressing on the network the headset is connected to.
If your headset reboots, or the battery dies, wireless ADB will be automatically disabled and you’ll have to repeat the steps above again.
Sideloading content from the SideQuest store
Within the SideQuest app on your computer, you can browse and search all of the available content to sideload. Simply scroll down on the home page until you see the “all games and apps” section. From here you can browse through all the games and apps, and see screenshots and descriptions before choosing what to install.
If you see one you want to install, just click the app/game listing and press the “install to headset” button, which should be on the right hand side of the screen.
SideQuest will then install the game or app you have chosen to your Quest device. You can check the progress of the installation by clicking on the ‘Tasks’ button, located top right of the screen. If the app was downloaded and installed correctly, you should see a notification which reads “APK file installed ok!!”.
Congratulations! You’ve successfully learned how to sideload one of the apps from the SideQuest store. You can download as many as you like, depending on how much space you have on your device. If you don’t like one that you have installed, you can simply remove it in the same way as any other Quest app.
Sideloading from an external source
The SideQuest store, like the App Lab store, doesn’t list every single app or game that can be installed on the Quest. You may find one online that is outside of these. You can still sideload them onto your quest with SideQuest, even when you don’t get them from there.
If this is the case, you’ll probably have found the link to an APK (.apk) file the developer has uploaded. You can easily use SideQuest to sideload these APK files. To do this you’ll need to click on the ‘install APK file from folder‘ button.
From here you can locate and select the APK file you downloaded. SideQuest will then install the app or game onto your Quest, similar to how it would do so for one of the apps on SideQuest itself. The ‘Tasks’ tab will show you if this process was successfully completed.
Loading sideloaded apps
Sideloaded apps will load the same any other regular Quest app you get in the store, however they won’t be found in exactly the same place.
Inside your Quest’s library, all sideloaded apps or games will appear under a different category called ‘Unknown Sources’. On the latest Quest user interface, there will be a ‘Unknown Sources’ category in the library’s drop down menu on the top right. From there, you will able to launch your sideloaded app or game.
It is also important to be aware of the Oculus Content Guidelines when sideloading content, to ensure you’re not violating anything with the content you’re sideloading onto your device. You might want to give our report on Oculus’ Content Guidelines and sideloading a read before you jump into the thick of it.